Archive for the 'development' Category

My simple IP Socket Server in Python

Friday, June 25th, 2010

This is a small python code I wrote to create easily apps that connect using a socket.

The interface is really fast:

from easyserver import *

def on_client(info):
print “Alguien viene… ”
print info.details

def on_message(info, msg):
print “Dice: ” + msg

def on_close(info):
print “Se fue…”
print info.details

EasyServer(20000,on_client, on_message, on_close)

This will call any of those callbacks anytime somebody connects to the server listening in port 20000. More simple is impossible.

Here is the code: easyserver.zip

DDS in Python

Tuesday, September 22nd, 2009

Due to some work duties I’ve been all day messing around with DDS files and python. DDS is a file format that is capable to store compressed textures, the interesting thing is that the compression algorithms on DDS files are supported by the current graphics card, it means you don’t have to uncompress them before sending them to the VRAM, opposed to what you would do when you  use JPGs (you have to load the file, uncompress it, ans send it to VRAM).

There are more pros, the mipmaps for instance, with the regular textures the driver is in charge to create the mipmaps when uploading a texture, and that is slow as hell, indeed most of the time we spend uploading a texture is the mipmaps’s construction process.

And there is still an advantage, the textures are stored compressed in VRAM (less memory), and can be accesed without uncompressing the whole texture, so it means the internal buses of the card are more free, and it traduces to better performance.

Ok, so what about DDS in python? well, sad news is I couldnt find anybody who made a DDS file loader, PIL doesnt support them. So maybe I will get interested on adding DDS file support to my little framework.

It is not hard, I just need to read the header but to support DDS means lots of work.

But once again, too much wrapping, not enough creation. So this feature will get on hold till I really need it.

Today I found this interesting work by Dasol, it is a procedural spiral generator and he uses also some celullar automata for the background. I felt like he beated me somehow because that was more or less the kind of stuff I tryed to achieve when coding my celullar automata but I didn’t spend much time in polishing it or giving it some kind of meaning. Also the automata is cool, and the way he renders the board (using a texture for every cell looks cool when you zoom in) is clean.

Anyway, ideas for the pyncel app:

  • create a SceneGraph
  • refactor the canvas to make every canvas more like a SceneEntity of a SceneGraph
  • some tools to move and rotate objects
  • create a background texture loader
  • create a internet image loader

Sounds boring but the results could be nice. So no screenshots or code for today.

Hackpact Day 10: Bug fixes and multicanvas

Friday, September 18th, 2009

Today some minor bug fixes, for instance, I extended the app to support more than one canvas at the same time. The idea is to overlap them as layers but right now I just use them as a way to extend the canvas on the sides which should be the same as having a bigger canvas, but I want to use separated canvas so maybe in the future I have some kind of infinite canvas where it can create new ones just but painting outside of the current canvas.

But it didnt worked, I only could paint in the first one, in the other ones it didnt paint. I was convinced that it was a problem with the FBOs in the RenderTexture, so I keep watching all the OpenGL code without much luck. Then today I realize that the problem was the brush, after painting in the first canvas the internal var storing the last time it painted was updated, so when it has to paint in the other canvas it block it according to the flow property in the brush.

So now I have several canvas that I can overlap, I don’t have an interface to move them around, to sort them in Z or to choose the active one, and I’m lazy about it, I don’t want to code GUI stuff, so I will see how I can sort it out.

I also discovered an easier way to create a FileDialog, check the code:

def ChooseFileDialog(caption="Choose a file",folder="C:/",default="file.png",wildcard="*.png"):
 result=""
 app = wx.PySimpleApp()
 dlg = wx.FileDialog(None, "", "c:/", "", "*.*", wx.FD_SAVE)
 if dlg.ShowModal() == wx.ID_OK:
  result = dlg.GetPath()
 app.Destroy()
 return result

Better than the last one, indeed I don’t think I need the Destroy line, but I’m always scared of leaving an app running in background because I don’t have any way to check it.

I also added the option to resize the application window, more according to the kind of application I’m creating.

Today there is no code to upload, I don’t think it will be interesting to release this version without a propper control. I’m also planning to create new brushes and textures.

hackpact_4canvas

You can see 4 canvas arranged horizontally. I render a grid to make it easy to see it.

Hackpact Day 9: Text and Widgets

Thursday, September 17th, 2009

I think I totally have lost the path in this project. I wanted to experiment more about different ideas and instead I’m building a full application, which somehow is good because I’m touching all the fields of python, but I miss to have more crazy ideas.

So I don’t know what will I do next, I think that the current version of Pyncel is enought powerful to do interesting things. Btw, the name comes from pincel (brush in spanish) and python.

I want to do experiments with automated brushes, for that purpose I will create a XML file document where I will write all the info, the textures filenames involved, the preassure, and more settings. But not just that, Im planning to put a little bit of source code in the XML, so when you load a brush you can add some automations.

Today I’m going to put the source code of the latest version. It is growing fast so now there are a lot of files, but they are well defined so it is easy to understand.

There is only one new module required, WxWidgets. I added it because I wanted to have some dialogs for loading or saving files, and I thought it would be stupid to code them by myself. But it doesnt mean all the app runs on Wx now, I just created a tiny WxApp that is created when you need the dialog, and destroyed afterwards, and it works perfectly for what I need.

Here is the source code to have a FileDialog:

def ChooseFileDialog(caption=”Choose a file”,folder=”C:/”,default=”file.png”,wildcard=”*.png”):

class SAPPWX(wx.Frame):

myfile=””
def __init__(self,parent,id,title):

wx.Frame.__init__(self,parent,id,title)
self.initialize()

def initialize(self):

dlg = wx.FileDialog(self, caption, folder, default, wildcard, wx.FD_SAVE)
if dlg.ShowModal() == wx.ID_OK:
SAPPWX.myfile = dlg.GetPath()
self.Destroy()

app = wx.PySimpleApp()
frame = SAPPWX(None,-1,”)
app.MainLoop()

return SAPPWX.myfile

I though it was interesting to have such a freedom to create a GUI element without having to deal with all the application stuff. Maybe there is a better way to do this but I didnt found it. I am concerned that maybe the wx app is still running in the background…

I also wanted to render a little HUD but I know from previous work how hard it is to draw text on a OpenGL application, so I just used the GLUT options to raster text, it is slow and ugly, but it is just 3 lines of code without addind more dependencies. The only problem is that it doesnt allow you to change the font-size, but I don’t care.

So here it is the source code: hackpact day 9

And some random screenshots made with the latest version:

nebula

nebula2

Hackpact Day 8: Refactoring, classes and operators

Wednesday, September 16th, 2009

I’ve been improving my canvas app these days but I didn’t have time to blog about it, sorry, thats the reason why I’m a few days behind. Mainly because most of the work done is not really interesting, it is more about refactoring my old code, arranging it in a more clever way, and dealing with stupid problems.

I have improved the way the brushes behave, I created new brushes, and solve some bugs.

The only interesting thing I did was to create a Vector class, the common class you use to store the coordinates of a point. I overwrited all the operators so now is transparent to use the class, it behaves more like a list, but you can multiply it or divide it, operate between Vectors, etc.

That task is kind of fustrating, when you are an experienced C++ programmer and you jump to a high level language like python you always miss some of the low level part of programming. For instance, in python if I have an instance in A and I do “B = A” then A and B share the same instance, so vars behave more like pointers.

That is a big source of bugs, because most of the times I dont realize python don’t do copies unless you say it explicitly, and I have several vars sharing the same instance. So now I tend to solve the problem having an option in the constructor of a class that receives an instance. So I can do:

a = vec([10,10])

b = vec(a) # this is a copy

All the information you need about OOP in python is on the internet, so that is not a big problem. But to code the class Vector was more like a test, because I will end up using the CG library I wrote about some posts ago, I don’t like to have more dependencies but I don’t want to code all those low level maths, more when I hardly know how to make efficient functions.

Here is my Vector class, it can be used for 2,3,4,or N dimension vectors, and you can use it where the app expects a list and it wont crash:

from copy import copy
from math import *

class vec:
    def __init__(self,v=[0.0,0.0]):
        if type(v) == list:
            self.data=v
        elif type(v) == tuple:
            self.data=list(v)
        elif v.__class__.__name__== self.__class__.__name__:
            self.data = copy(v.data)
        else:
            raise Exception("Wrong parameter type:" + str( type(v)) )

    def __repr__(self):
        s = "vec("
        for a in self.data: s += "%0.3f,"%a
        return s[:-1] + ")"

    def toList(self):
        return copy(v.data)

    # overload []
    def __getitem__(self, index):
        return self.data[index]

    # overload set []
    def __setitem__(self, key, item):
        self.data[key] = item

    def __add__(self, other):
        return vec( map(lambda a,b:a+b,self,other) ) #[self.data[0] + other.data[0],self.data[1] + other.data[1]] )

    def __sub__(self, other):
        return vec( map(lambda a,b:a-b,self,other) )

    def __mul__(self, other):
        if type(other) == int or type(other) == float:
            return vec( map(lambda a:a*other,self) )
        else:
            return vec( map(lambda a,b:a*b,self,other) )

    def __div__(self, other):
        if type(other) == int or type(other) == float:
            return vec( map(lambda a:a/float(other),self) )
        else:
            return vec( map(lambda a,b:a/float(b),self,other) )

    # return size to len()
    def __len__(self):
            return len(self.data)

    def copy(self,v):
        self.data = copy(v.data)

    def module(self):
        return sqrt(sum(map(lambda a: a*a,self.data) )  )

    def distance(self,b):
        return (b-self).module()

Today there is no screenshots or code, sorry, but check the next post.

Hackpact Day 7: bytes, pixel formats, PIL and to Save

Wednesday, September 16th, 2009

Today I wanted to add the scrolling feature to my canvas, so I can have a canvas larger than the window.

To implement the feature was easy, but then I realized that when I did the “save” function I only made a dump of the screen, not the whole texture, and now the texture was bigger than the screen, so I needed a save method on the RT class.

It wasnt hard to code it, but the problem came when I tryed to save the RGB16F RT, it just didnt work, the pixels in the resulting image looked like it was taking one byte per pixel and channel instead of reading it as a Float, somehow it was obvious, you cant pass an array of bytes to a function and expect it will know how to handle it, but the documentation of PIL (the library used to handle images in python) is crap, they don’t explain well how to specify the pixel format when is 16 or 32 bits and has more than one channel.

I have been searching info all day long and nothing was found, I just end up thinking PIL doesnt support to read images in RGB with channels of more than 8 bits. They say something about a “F” format if you use the fromBuffer function, but the encoder looks like it only allows one channel images. Silly.

Then I had an idea, if I take every pixel and divide it by 256 (when a short is used) I will have a 8 bits precission, indeed I don’t need to save a 16bits image, mainly because not a lot of file formats supports it (and right now Im using JPG).

I tried to do so, to divide every pixel read from the buffer by 256 and store it using 8bits per channel. First, it wasnt easy, because the image is stored using numpy, which I understand, but the documentation of numpy is crap, they don’t tell you some basic things like how to convert from one data type to another, or how to apply a function to every value of the matrix. So finally I discovered how, but it didnt work, it appear like some values where out of bounds.

So after wasting a whole day just to save a image I came up with the simplest idea, to create a temporary RGB image with 8 bits precission and render a quad using the other texture. I’m wasting some memory and performance but it works and it is easy.

No screenshots today or resources today.

Hackpact Day 6: Application and Canvas

Thursday, September 10th, 2009

I’m three days behind, I know, but I’ve been coding hard last days, but I never found time to write in the blog about it, and also I wanted to have a nice version without bugs before I share it here.

So what I’ve been coding these days? Well, I pushed away the old code about cubes and cellular automatas, and started something new from scratch, but first I refactor a little bit my code to create a classic class in almost every interactive application, the Application class.

This class encapsulates the ugly and boring code common to all Applications, like creating the window, the main loop, reading the input, calculating the elapsed time, quitting the app in a clean way, and some minor stuff.

When refactoring I tryed to use as much python tricks as I could, not just the regular C++ syntax, I followed some nice tutorials were they explain how to take advantage of the python features to reduce the amount of code, this particularly was preaty useful: Python Tips, Tricks, and Hacks

This translates to a better use of lists, parameters in funcions, and iterations in general.

I even added some exceptions to avoid leaving the window open if the application crashes, that was anoying.

So I refactor my old code to make it really simple to create an application from scratch, here is one example:

#!/usr/local/bin/python

from OpenGL.GL import *
from OpenGL.GLU import *
from GLTools import *
from shaders import *
from Application import *

WINDOW_SIZE = [800,600,False]

class MyApp(Application):

 def init(self):
     glDisable( GL_CULL_FACE )        
     self.logo_tex = Texture()
     self.logo_tex.load("data/tmt-logo.png")

 def render(self):
     glClearColor(0.0, 0.0, 0.0, 1.0)
     glClear(GL_COLOR_BUFFER_BIT|GL_DEPTH_BUFFER_BIT)

     glBlendFunc(GL_SRC_ALPHA,GL_ONE)
     glEnable(GL_BLEND)
     glColor3f(1.0,1.0,1.0)
     self.logo_tex.render([-1,1],[2,-2])

 def update(self, time_in_ms):
      pass

app = MyApp()
app.createWindow("My App", WINDOW_SIZE, WINDOW_SIZE[2] )
app.start()

The formating here is a little bit messed up but you can download the file from the sourcode file at the end of this entry.

Then I decided to create an application in 2D, I’m a little bit tired of 3D cubes and I don’t plan to create a mesh loader for the moment, for now I want to focus in other ideas, more headed to pictures and basic shapes.

I remembered and old idea about creating something similar to a canvas where to draw in a Photoshop way. I like to use Photoshop to do illustration but sometimes I have ideas of brushes that can’t be done with the features of photoshop (maybe in the latest versions they have added them).

The idea is to create a RenderTexture and to use it as a canvas, then to draw texturized quads on the RT when painting, they can be paint using blending to achive cool overlay effects, and I have complete freedom to resize, rotate or do other tricks on the brush. Creating a canvas was easy and that was done two days ago pretty quickly once I had the Application class to handle the mouse and keyboard events.

But I thought it didn’t had too much interest, mostly because the tool barely had any feature that couldnt be done in photoshop.

The next day I spend some time playing with the app and adding some common features like saving the image to disk, the Undo option, having different brushes, controling the alpha and the repetition, etc.

I have some ideas in mind for the future, for starters, I want to create special brushes, that behave like they have their own life (auto-brushes in advance), then I want to create a big canvas, not just the one I have now, something bigger composed  by several RTs, and leave the auto-brushes wandering around, drawing strange shapes.

I also have more features that I would like to add, like having layers ‘a la photoshop’, sharing the canvas online like in webcanvas, or having a small class to do on-the-fly coding for the brushes.

Lot’s of ideas in this field to explore…

Problems found

During the refactoring I found some anoying problems related to python and OOP, mostly because some internal behaviours. For instance, all the brush instances where sharing the same list instance for the textures, instead of having their own due to have initialized the list on the body of the class, not in the constructor.

Other issues where related to openGL. Dealing with RTs based in FrameBuffer Objects is simple in concept but tricky in practice, mostly because it can behave erratic under some systems. My friend Miguel Angel is having some issues with the openGL code in his machine, and I’m having some in mine.

Also, I had a pixel resolution problem when doing the canvas. If the brush paints too much quads in the same region it is easy to overdraw the same zone quickly which doesnt looks nice, then the solution is to draw quads with a small alpha so the color increases slowly, but this has a problem, if the brush alpha is too small and the texture has also alpha or values closer to zero, when both values are multiplied and stored in the RT, there is not enough pixel resolution and they are clamped to the closest value, creating ugly artifacts.

The solution is obvious, increase the resolution for the RT, instead of having 8bits per channel (the usual) I changed the RT code to support more formats, like 16bits or 32. This was tricky because I don’t know how they behave in different cards, and my first surprise was when I tested in my home computer, it was running at 2 frames per second, just because my GForce 6600 doesnt like too much the RGB32F format. I made some fixes to use 16bits but I got dissapointed that drawing a quad in a 32bits texture could reduce the performance to 2 fps.

I had more problems but now I don’t remember, probably because they weren’t too much important.
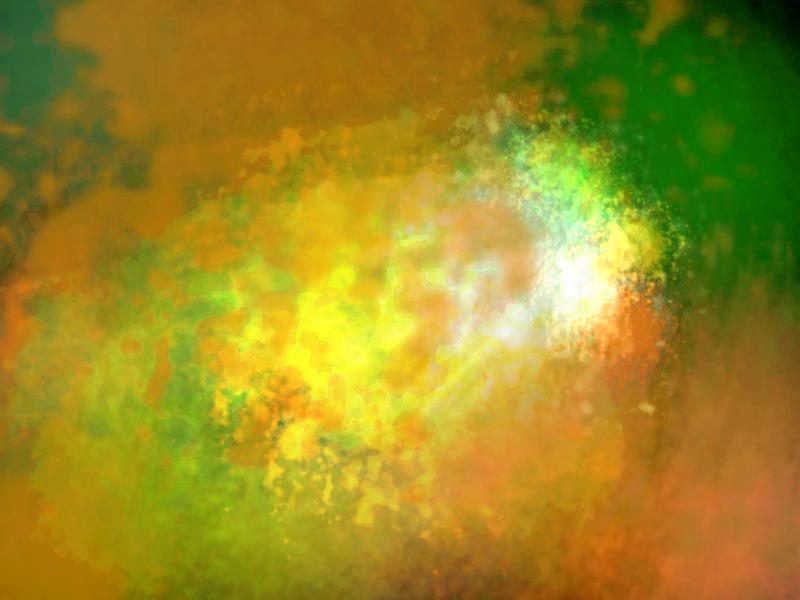
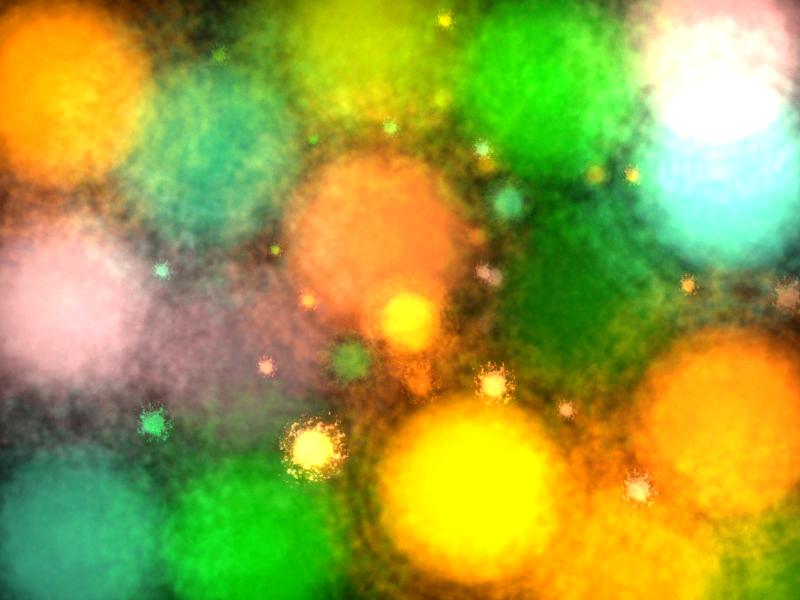
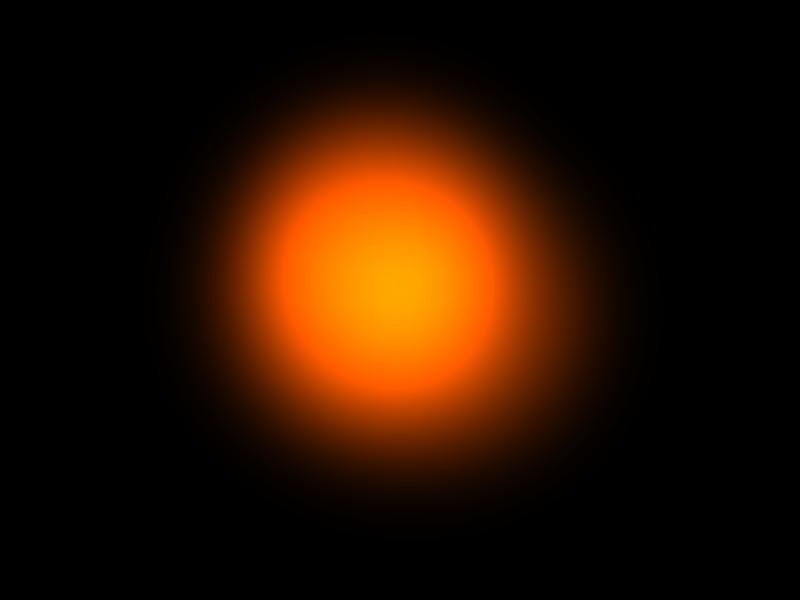
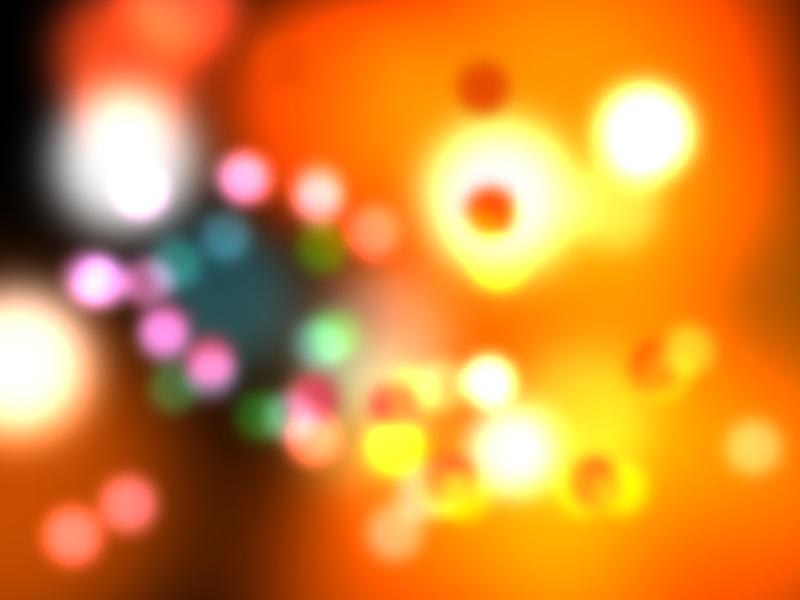
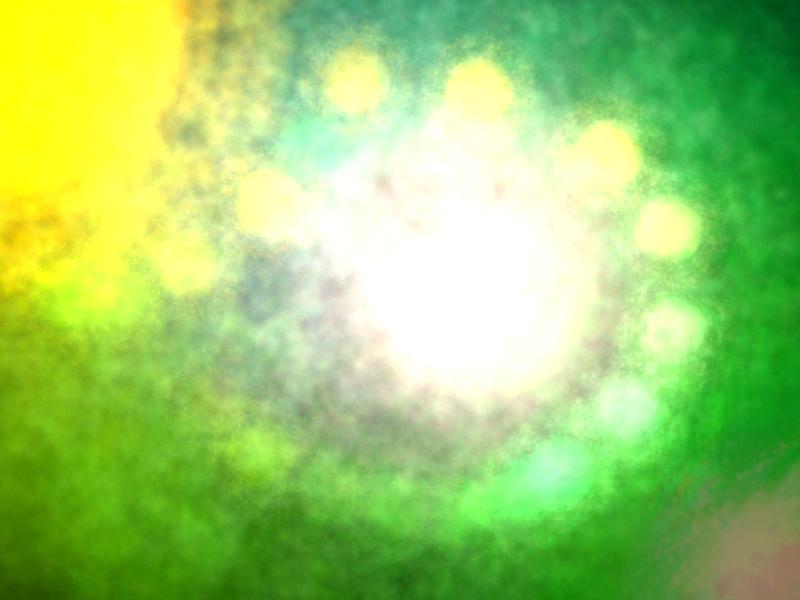
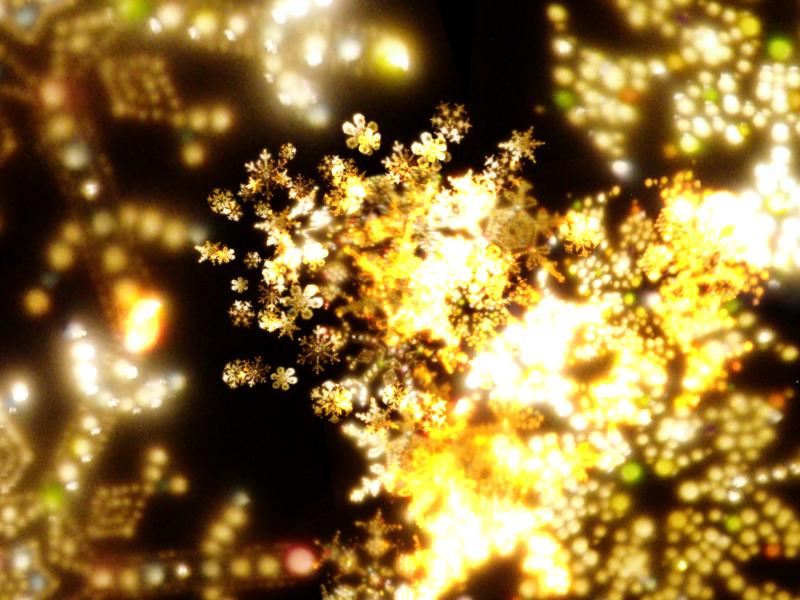
Screenshots

Here are some of my artistic results, I created some brushes in photoshop but I enjoy playing more with the plain ones.

Code

There are lots of keys so here is a list:

  • 1-5 to change between brushes
  • Control Z to Undo
  • Control S to save to disk
  • Keypad / and * to control flow
  • Keypad + and – to control preassure
  • Keypad . to change between white and rainbow color
  • C to clearthe buffer
  • Mouse Wheel to control the brush size
  • Shift Mouse Wheel to control brush rotation

You can download it from here: hackpact day 6

Hackpact Day 5: Conway in a cube

Sunday, September 6th, 2009

Today I was a little bit short of ideas, and having the latest Alone In The Dark game didn’t helped.

So I decided to give a better look to the conway shader I coded yesterday, so instead of using it as a PostFX I used it as a texture for the cube. It was easy, I only had to add the texture coordinates to the cube and activate the result texture from the conway code when rendering the cube.

I can’t say the results are very good but for those who love the cellular automatas it is fun to see.

I tryed to improved a little bit the conway shader but I ran out of ideas. I end up putting a different world in every color channel, so what you see is three boards at the same time (red, green and blue). I start the world using a texture which is in grayscale so more or less all channels start being almost the same.

All the faces in the cube use the same texture, and when I coded the conway I forced the textures to repeat on the edges, so it gives the look and feel that every face behaves diferent, but they are all the same.

I also tryed to render the cube several times with diferent sizes to give the feel that the pixels have volume, but it didnt worked. So at the end I just took advantage of the posibilities of the graphics card and use a texture big enough to have a huge conway world, and it looks fun when you see so many cells in action.

Now screenshots and source code:

hackpact_day5_screenshot1

hackpact_day5_screenshot2

Here you can download the source code: hackpact day 5

Hackpact Day 4: Textures and Conway

Saturday, September 5th, 2009

Today I have been playing around with python for eight straight hours and the results are not very impressive, too much time wasted in stupid problems. Mostly because I keep thinking in C++ and some of the simple tasks I usually do when coding graphics under C++ are a pain in the ass in Python.

For example, to create a multidimensional array in an efficient way, impossible, you need to use Numpy, which is a module specially designed for this purpose, but even though through numpy I took me lot of time to figure out how to apply an action to every cell.

Or for example trying to refactor my RenderTexture class I created the Texture class that allows to load textures from disc, but then I wanted to make RT inherit from texture and I like to have several constructors, but in Python you can’t distinguish two constructors by the type of the parameters (mainly because there is no specified types) so I had to use a different approach (dictionaries for the trivial parameters).

Also I had to deal with the classical OpenGL problems when creating the Texture class, they didn’t render correctly due to the pixel packing (I always forget that!), and some other issues.

So to do something cool I created a PostFX using Conway’s Game of Life idea, which turn out not to be so fanzy and I don’t think it deserves an screenshot here. Because if you apply it to every frame it looks more like an edge detection algorithm.

I’m just a little bit upset that I wasted so much time with things that didn’t translate to anything interesting. And everyday I become more and more worried that I’m wasting precious time in re-coding my old framework under a different language, which would be a stupidity because I could have keep using the old one under C++.

The reason to move to python is to explore new fields in graphics, not to do the same but in an slow and rusty way.

For the next episode I have some ideas, first I want to test Numpy in depth, second a friend told me about a python module specially designed to the mathmatics involved in graphics (vectors, matrices, etc), something I really need If I pretend to create something over Python. And for the ending I want to do some test about reloading the code without restarting the application.

And now some screenshots and the source code:

hackpact_day4_screenshot2

hackpact_day4_screenshot1

It is just a conway game of life executed in a shader, nothing impressive at all. Miguel Angel helped me with the automata rules.

Here is the source code: hackpact day 4 and if you want to use it, when you hold LeftControl key it renders the Game of Life, and if you hold LeftShift it takes the boxes image as input, so tap LeftShift once while you hold LeftControl, also with the keypad Divide and Multiply you change a threshold I added to the automata and it makes some funny worlds.

Hackpact Day 3: PostFX and 2D Algorithms

Friday, September 4th, 2009

First a little comment about RenderToTexture. My RTs are based in FBOs (Frame Buffer Objects), thats a feature relatively new on OpenGL and not well supported by all the graphics card.

Yesterday I was testing my app under OSX where I have everything installed (I used Macport to install python and all the libraries) and it crashed because the FBOs were not supported. Thats impossible because it is a MacBook and I know the card supports it, but for some reason the OpenGL functions relative to FBOs are not pointing to the right place on the driver, I don’t know what to do to solve it.

I also tested it in my other computer which runs Windows 7, and pygame crashes due to a problem with MSVCR71.dll, I guess is a SDL problem and Visual Studio, the funny part is that it works when I run the script from python IDLE. Weird. So at the end using python and opengl is not as cross platform as I thought.

My friend Miguel Angel pointed out also something curious, he had the same problem as Bastiaan when calling one of the OpenGL function, but that problem didn’t occour to me, it has to be something with the versions we are using, so I guess the Pyopengl API is not so solid and it is changing between versions more than what I would like, that could be a problem in the future, we will see…

PostFX

Today I’m gonna try to code a simple PostFX shader to see if I’ve got the basics.

The wrapper I did for the shaders is too simple right now, it doesnt support to upload textures to the shader, and that is mandatory, so thats my first enhacement. Also I haven’t test loading and showing a texture, indeed I coded the RT class without having a Texture class first (usually RT inherits from Texture).

I was expecting to find a class that encapsulates all the boring part of a texture, like texture formats, filters, etc, but I wasnt so lucky.

I’m worried about something, I don’t want end up doing the same I do everytime I start coding in a new language/platform. I always start wrapping the things I need, and keep doing it till I have been doing technical stuff so long that I get bored, instead of creating the application I create the tools, and the application never comes… It is a death spiral where I always fell. In game development there is a saying: “those who code game engines never code a game”, and it is true, as soon as you start coding your own engine you are always chasing a new feature instead of trying to create something with the features you already have.

So my plan now is to create the ultrabasic needs, which will be to have textures, shaders, RTs, maybe meshes (something simple) and a tiny graph editor, but I will talk about this when the time comes.

Ok, so I made a PostFX shader, I added the function to upload a texture to a shader and for my first test I rendered the same scene but reversing the colors and it worked.

gl_FragColor = vec4(1,1,1,1) – texture2D(texture,gl_TexCoord[0].st);

I was thinking of leaving that as an example of PostFX but that was too simple so I thought about something more complex.

Where you are coding a PostFX shader you read the pixel you are going to write from a texture, then you apply a function using the color of the pixel as the input and the output is returned from the pixel shader to be written in the same position of that pixel.

But sometime ago I realized that when it comes to PostFX you usually want to read not only that pixel, also the average of the pixels around that one, or in other words, you want to blur the pixel. To do that there are several options, one is to read all the pixels around your pixel from the texture and calculate the average, but for prototyping that is tedious, other solution is to blur the texture before passing it to the shader, but then if you want the original one you need two textures.

So I found a trick, to use the Mipmaps. Textures have mipmaps which are versions of the same texture but in lower resolution, and OpenGL allows you to create on-the-fly mipmaps of  a RenderTexture. It is kind of slow because it has to calcule all the mipmaps piramid even when you only want two or three levels, but the good thing is that it is only one line of code, so I added the option to the RenderTexture class.

I have used this trick in the past to create lens effect, motion blur, depth of field, etc. Obviously the results are not perfect in comparison with a good gaussian blur, but it does the task.

For this example I read the channels of the pixel separatly, with a little offset in X and I also add some blur to the red and blue component. Here are the results:

hackpact_day3_screenshot

And here is the source code: hackpact day 3